


framework7+AdonisJS
Introduction
This tutorial will show you a step by step method on how to use two powerful JavaScript frameworks and MySQL database to build a hybrid app that works and looks just like twitter.
What we will Achieve
If you are looking to see or build a real world application with Framework7 and AdonisJs, follow through to the end because this tutorial is made just for you. What we will do in this tutorial is outlined as follows:
Install Framework7 and AdonisJS on our Local machine. NOTE that you must have NodeJS and NPM already installed to be able to use Framework7 or AdonisJs. Follow this guide to Install NodeJS and NPM
We will configure our database and create Migrations, Models and relationships in AdonisJs. Note that We will use AdonisJs to create APIs that will be consumed by our Framework7 Application.
We will install and style our Framework7 application to have a look similar to twitter. Then we connect the API created to the application
We will deploy to Google Play Store and Apple App Store
Is this Course/Tutorial for me?
You will find this tutorial interesting if:
You know the basics of JavaScript or programming
You want to Explore Framework7 or AdonisJS
You know NodeJS
You Know PHP/Laravel and is looking for a JavaScript alternative
You want hands on knowledge of how to build and publish a hybrid app to Google Play Store and Apple App Store
You want to publish your own Application
You just love to learn new things
PS: I am a freelancer and if you have any project in mind, contact me at davidshemang@gmail.com let’s work on your project idea.
Let’s get Started!!!
Setting up our APIs in AdonisJS
AdonisJS is a Node.js web framework with a breath of fresh air and drizzle of elegant syntax on top of it. It was built by Aman Virk.
Here some reasons why I chose, and why you might want to choose, AdonisJS also:
Written in pure JavaScript, so no fuss around running transpilers and fighting with them.
A bunch of first-class add-ons for: sending emails, I18n and writing terminal commands and support for unit testing, API and browser tests.
Extensive documentation.
AdonisJS has an active and growing community.
In this tutorial, we’ll be using the latest version of AdonisJS 5.0 We will install AdonisJS on our computer using Adonis CLI. The Adonis CLI is a really handy tool which which will help us in creating new AdonisJS applications. It also comes with some useful commands. To install the CLI, enter the command below:
npm i -g @adonisjs/cli
Now we can start building our APIs by creating a new Adonis app using the CLI we just installed.
adonis new tweetar-api --api-only
By passing the --api-only flag, we are telling the Adonis CLI to use the API only blueprint while creating the app. This will create an app well suited for building APIs as things like views won’t be included.
Once it’s done. We can test the app to make sure everything is working as expected:
cd tweetar-api
adonis serve --dev

The application should be up and running on http://127.0.0.1:3333. You should get a JSON response as below when you visit the URL:

Congratulations if you got here!!!
Congratulations!!! You have successfully setup your AdonisJS application.
Now Let’s setup the database and configure CORS
The Tweetar app will use MySQL for storage. So, we need to install Node.js driver for MySQL:
npm install mysql --save
With that installed, let’s set up the app to use MySQL. Taking a look at config/database.js, you see config settings for different databases including MySQL. Though you can easily enter the MySQL settings directly in the config file, that will mean you’ll have to change these settings every time you change the application environment (development, staging, production etc.) which is actually a bad practice. Instead, we’ll make use of environment variables and depending on the environment the application is running on, it will pull the settings for that environment. We can easily do that with AdonisJS. All we have to do is enter the appropriate config settings in the .env file.
Open .env file and update the DB details as below:
// .env

DB_CONNECTION=mysql
DB_HOST=127.0.0.1
DB_PORT=3306
DB_USER=root
DB_PASSWORD=
DB_DATABASE=tweetar
Now create a database with the name tweetar and set the DB_USER and DB_PASSWORD with your database username and password. If you have WAMP server or LAMP server, this step will be very easy to accomplish.
Let’s configure CORS!!!
“CORS” stands for Cross-Origin Resource Sharing. It allows you to make requests from one website to another website in the browser, which is normally prohibited by another browser policy called the Same-Origin Policy (SOP). We used the --api-only flag, to create our application which Automatically installed CORS. Cool right? All we have to do now is configure it. The package comes with a configuration file which is located in config/cors.js. Open it and update these two options as below:
`// config/cors.js

// Allow current request origin
origin: true,

// HTTP methods to be allowed
`methods: \['GET', 'PUT', 'PATCH', 'POST', 'DELETE'\],
With This Setup all done, let’s go ahead to create our Backend Logic and API.
First, we start with the User Model. Adonis creates a default user model and migration file so all we need to do is to edit it to suit our tweetar application. Open database/migrations/TIMESTAMP_user.js and update the up method as below:
`// database/migrations/TIMESTAMP_user.js

up () {
    this.create('users', table => {
        table.increments()
        table.string('name').notNullable()
        table.string('username', 80).notNullable().unique()
        table.string('email', 254).notNullable().unique()`
        table.string('profile\_pic', 254).notnullable() `
        table.string('password', 60).notNullable()
        table.string('location').nullable()
        table.string('website_url').nullable()
        table.text('bio').nullable()
        table.timestamps()
    })
}`
The schema above will create a users table in the database with the quoted fields. “increments” will create ids for every new user while “timestamps” creates two fields (created at and updated at). AdonisJS is very easy to use. Next, we need to call the migration:run command to run migrations (which executes the up method on all pending migration files):
adonis migration:run
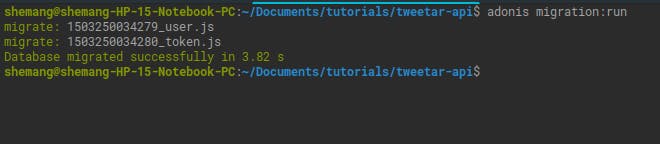
You should see similar result if all is successful.
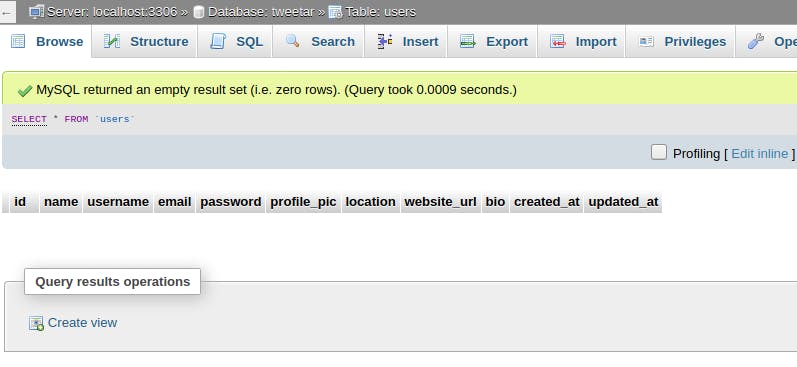
You’ll see that a users table was created in the database with the fields in our up command.
Creating a Tweet Model
We need to create a Tweet model and its migration file just like we had with the user that was created by default. To do this, we’ll use the Adonis CLI make:model command:
adonis make:model Tweet -m
The -m flag indicates we want a migration file created along with the Tweet model. Open database/migrations/TIMESTAMP_tweet_schema.js and update the up method as below:
// database/migrations/TIMESTAMP_tweet_schema.js

up () {
    this.create('tweets', (table) => {
        table.increments()
        table.integer('user_id').unsigned().notNullable()
        table.text('tweet').notNullable()
        table.timestamps()
    })
}
This will create a tweets table with the fields in the up method just as it did in user. Next,we run the migration using adonis migration:run
Reply Model and Migration
We will now create a reply model and migration to give users the ability to reply to a tweet. we create it thus:
adonis make:model Reply -m
Let’s update the up function in our reply migrations to create a replies table in our database. After that, run the
// database/migrations/TIMESTAMP_reply_schema.js

up () {
    this.create('replies', (table) => {
        table.increments()
        table.integer('user_id').unsigned().notNullable()
        table.integer('tweet_id').unsigned().notNullable()
        table.text('reply').notNullable()
        table.timestamps()
    })
}
Next,we run the migration using adonis migration:run This creates a replies in our database table with the fields (id, user_id, tweet_id, reply and timestamps).
Favorites Model and Migration
We will give users the ability to like a tweet. so let’s create a favorite model and migration:
adonis make:model Favorite -m
Let’s update the up function in our favorite migrations.
// database/migrations/TIMESTAMP_favorite_schema.js

up () {
    this.create('favorites', (table) => {
        table.increments()
        table.integer('user_id').unsigned().notNullable()
        table.integer('tweet_id').unsigned().notNullable()
        table.timestamps()
    })
}
Next,we run the migration using adonis migration:run
Followers Migration
Users will be able to follow one another, and we need to create a database table that will cater for this. We don’t need to create a new model for this since we already have and can make use of the User model. We only need to create a migration file. For that, we’ll make use of the Adonis CLI make:migration command:
adonis make:migration followers
Then select Create table on the prompt and open the newly created migration followers_schema file to update the upmethod:
// database/migrations/TIMESTAMP_followers_schema.js

up () {
    this.create('followers', (table) => {
        table.increments()
        table.integer('user_id').unsigned().notNullable()
        table.integer('follower_id').unsigned().notNullable()
        table.timestamps()
    })
}
Next,we run the migration using adonis migration:run
Relationships
Relationships are the backbone of data-driven applications, linking one model type to another without the need to touch an SQL statement or even edit an SQL schema. Having defined the models for our tweetar app, now let’s define their relationships.
User and Tweets Relationship
A user can post as many tweets as he/she wants, but a tweet can only belong to a user. In other words, the relationship between User and Tweet is a one-to-many relationship. We then open theapp/Models/User.js and add the code below to it:
`// app/Models/User.js
tweets () {
return this.hasMany('App/Models/Tweet')
}`

ALWAYS add the methods inside the class of each model you are updating.
To complete the relationship, we need to define the inverse relationship on the Tweet model. Open app/Models/Tweet.js and add the code below to it:
// app/Models/Tweet.js

user () {
    return this.belongsTo('App/Models/User')
}
User and Followers Relationship
A user can have many followers and the user can follow many users also. This is a many-to-many relationship.
To define this, open app/Models/User.js and add the code below to it:
followers () {
    return this.belongsToMany(
        'App/Models/User',
        'user_id',
        'follower_id'
    ).pivotTable('followers')
}
The belongsToMany relationship makes use of an additional 3rd table called pivot table to store foreign keys for the related models. Recall where we created migration for followers, we said it will make use of the User model. So both relationships (followers and following) will be defined on the User model. The follower table will be used as a pivot table.
Next, we define the inverse relationship. Still within app/Models/User.js, add the code below:
following () {
    return this.belongsToMany(
        'App/Models/User',
        'follower_id',
        'user_id'
    ).pivotTable('followers')
}
User and Replies Relationship
A user can reply multiple times to a tweet, while a single reply can only belongs to a particular user. This is a one-to-many relationship. Open app/Models/User.js and add the code below to it:
replies () {
    return this.hasMany('App/Models/Reply')
}
Then define the inverse relationship on the Reply model. Open app/Models/Reply.js and add the code below to it:
user () {
    return this.belongsTo('App/Models/User')
}
Tweet and Replies Relationship
A tweet can have multiple replies, while a single reply can only belongs to a particular tweet. This is a one-to-many relationship. Open app/Models/Tweet.js and add the code below to it:
replies() {
    return this.hasMany('App/Models/Reply')
}
Then define the inverse relationship on the Reply model. Open app/Models/Reply.js and add the code below to it:
tweet() {
    return this.belongsTo('App/Models/Tweet')
}
Tweet and Favorites Relationship
A tweet can have multiple favorites, while a single favorite is for a particular tweet. This is a one-to-many relationship. Open app/Models/Tweet.js and add the code below to it:
favorites() {
    return this.hasMany('App/Models/Favorite')
}
Then define the inverse relationship on the Favorite model. Open app/Models/Favorite.js and add the code below to it:
tweet () {
    return this.belongsTo('App/Models/Tweet')
}
User and Favorites Relationship
A user can like multiple tweets, while a single favorite is by a particular user. This is a one-to-many relationship. Open app/Models/User.js and add the code below to it:
favorites () {
    return this.hasMany('App/Models/Favorite')
}
Then define the inverse relationship on the Favorite model. Open app/Models/Favorite.js and add the code below to it:
user () {
    return this.belongsTo('App/Models/User')
}
Building User Functionality
User Sign up
To start off building the user functionality, we’ll give users ability to sign up to the app. To do this, let’s create a /signup route. Open start/routes.js and add the line below to it:
Route.post('/signup', 'UserController.signup')

You should have something like this
When the /signup route is accessed, the signup method of UserController will be executed. This method handles signing up users.
Next, let’s create the UserController called above:
adonis make:controller User --type=http
Assigning http to the --type flag indicates we want an HTTP controller. This will create a UserController.js within app/Controllers/Http.
Open app/Controllers/Http/UserController.js and add the code below to it:
// add this code to the top of the file
const User = use('App/Models/User')
async signup ({ request, auth, response }) {
    // get user data from signup form
    const userData = request.only(['name', 'username', 'email', 'password'])

    try {
        // save user to database
        const user = await User.create(userData)
        // generate JWT token for user
        const token = await auth.generate(user)

        return response.json({
            status: 'success',
            data: token
        })
    } catch (error) {
        return response.status(400).json({
            status: 'error',
            message: 'There was a problem creating the user, please try again later.'
        })
    }
}
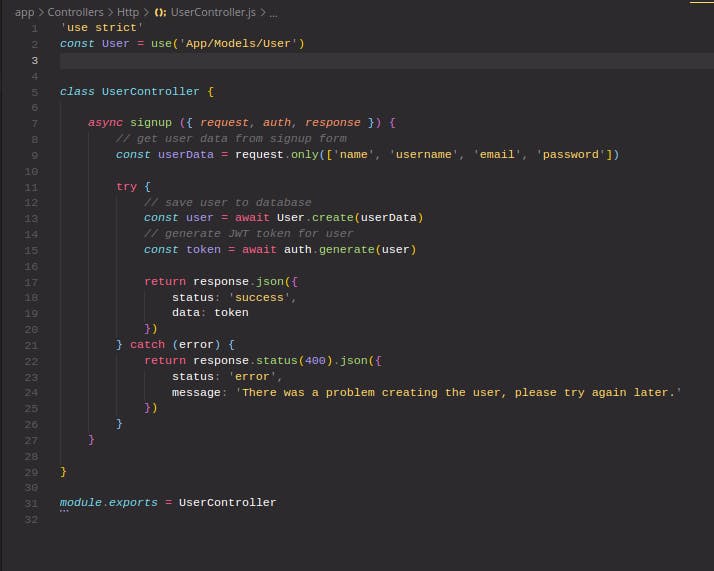
You should have something like this.
User Sign in
We’ll be using JSON Web Tokens (JWT) for user authentication. Because we created an api-only app, the app is already configured to use JWT for authentication.
Let’s create the /login route, open start/routes.js and add the line below to it:
Route.post('/login', 'UserController.login')
UserController's login method will be executed when the /login route is accessed. This method handles users authentication.
Next, let’s add the login method to UserController. Open app/Controllers/Http/UserController.js and add the code below to it:
async login ({ request, auth, response }) {
    try {
        // validate the user credentials and generate a JWT token
        const token = await auth.attempt(
            request.input('email'),
            request.input('password')
        )

        return response.json({
            status: 'success',
            data: token
        })
    } catch (error) {
        response.status(400).json({
            status: 'error',
            message: 'Invalid email/password'
        })
    }
}

Your user controller should look like this
Update User profile
A user might periodically want to edit his profile or add a profile picture. Updating user’s profile is going to be of two parts. First, we need to get the details of the currently authenticated user (user that wants to update his/her profile) from the database. These details will be used to pre-populate the profile edit form on the client-side. The second part is where the actual updating of user’s profile is handled.
Adonis Auth package comes with a auth middleware which automates the flow of authenticating specific routes by adding the middleware on them. The auth middleware has been registered for us because we chose the api-only blueprint while creating our app. So we can just start using it. We'll add the auth middleware to some routes we want secured. i.e, only authenticated users will be able access certain routes.
So to secure a route e.g the update profile route, we simply add the auth middleware to the route. Open start/routes.jsand add the code below:
Route.group(() => {
    Route.get('/me', 'UserController.me')
    Route.put('/update_profile', 'UserController.updateProfile')
})
    .prefix('account')
    .middleware(['auth:jwt'])
As you can see, we added the auth:jwt middleware. We also defined a group route with a account prefix. This means the routes will be accessible as /account/me and /account/update_profile respectively. This will save us some key strokes when defining user account related routes.
Next, let’s add the me method to UserController in app/Controllers/Http/UserController.js:
async me ({ auth, response }) {
    const user = await User.query()
        .where('id', auth.current.user.id)
        .with('tweets', builder => {
            builder.with('user')
            builder.with('favorites')
            builder.with('replies')
        })
        .with('following')
        .with('followers')
        .with('favorites')
        .with('favorites.tweet', builder => {
            builder.with('user')
            builder.with('favorites')
            builder.with('replies')
        })
        .firstOrFail()

    return response.json({
        status: 'success',
        data: user
    })
}
Calling the firstOrFail method will return the first user that matches the where clause and return an error if the ID supplied was not found in the database. In addition to getting the user's details, we also get the user's tweets, followers, users following and favorites the user has made by chaining the with method. The with method uses the relations (tweets, followers, following and favorites) we defined in earlier.
Next, let’s add the method that will do the actual updating of user details. Add the code below to UserController:
async updateProfile ({ request, auth, response }) {
    try {
        // get currently authenticated user
        const user = auth.current.user

        // update with new data entered
        user.name = request.input('name')
        user.username = request.input('username')
        user.email = request.input('email')
        user.location = request.input('location')
        user.bio = request.input('bio')
        user.website_url = request.input('website_url')

        await user.save()

        return response.json({
            status: 'success',
            message: 'Profile updated!',
            data: user
        })
    } catch (error) {
        return response.status(400).json({
            status: 'error',
            message: 'There was a problem updating profile, please try again later.'
        })
    }
}
Fetching a User Profile
As usual, we’ll start by defining the route. Add the line below to start/routes.js after the entire user account route group:
Route.get(':username', 'UserController.showProfile')
This route takes a username as the route parameter. This makes the route dynamic as different usernames can be passed to it. An example of this route will be something like http://tweetar.com/shemang_david.
Note: Because this is more or less a wildcard route, it should be defined at the end of every other routes so as not to take precedence over some routes.
Next, let’s create the showProfile method. Add the code below in UserController:
async showProfile ({ request, params, response }) {
    try {
        const user = await User.query()
            .where('username', params.username)
            .with('tweets', builder => {
                builder.with('user')
                builder.with('favorites')
                builder.with('replies')
            })
            .with('following')
            .with('followers')
            .with('favorites')
            .with('favorites.tweet', builder => {
                builder.with('user')
                builder.with('favorites')
                builder.with('replies')
            })
            .firstOrFail()

        return response.json({
            status: 'success',
            data: user
        })
    } catch (error) {
        return response.status(404).json({
            status: 'error',
            message: 'User not found'
        })
    }
}
Who to Follow
Before we move to add the functionality to follow and unfollow users. Let’s first make it possible for users to see those they can follow. Add the code below to start/routes.js above the user profile route:
Route.group(() => {
    Route.get('/users_to_follow', 'UserController.usersToFollow');
})
    .prefix('users')
    .middleware(['auth:jwt'])
Next, define the usersToFollow method. Add the code below to UserController:
async usersToFollow ({ params, auth, response }) {
    // get currently authenticated user
    const user = auth.current.user

    // get the IDs of users the currently authenticated user is already following
    const usersAlreadyFollowing = await user.following().ids()

    // fetch users the currently authenticated user is not already following
    const usersToFollow = await User.query()
        .whereNot('id', user.id)
        .whereNotIn('id', usersAlreadyFollowing)
        .pick(3)

    return response.json({
        status: 'success',
        data: usersToFollow
    })
}
First, we get the currently authenticated user. Then we get an array of IDs of users the user is already following. Using these IDs, we perform a query using the whereNotIn to filter the users to those whose IDs are not in the array of IDs. That way, users a user is already following won't be shown for him/her to follow again. We also exclude the currently authenticated user from the results as it doesn't make sense to tell a user to follow himself/herself. Then we pick only the first 3 rows from the results.
Finally, we return a JSON object with the users to follow.
Follow a User
Now, let’s add ability for users to follow one another. Add the code below to start/routes.js within the users group routes:
Route.post('/follow/:id', 'UserController.follow')
This route takes the ID of the user we want to follow as a parameter.
Next, add the code below to UserController:
async follow ({ request, auth, response }) {
    // get currently authenticated user
    const user = auth.current.user

    // add to user's followers
    await user.following().attach(request.input('user_id'))

    return response.json({
        status: 'success',
        data: null
    })
}
Unfollow a User
let’s add ability for users to unfollow one another. Add the code below to start/routes.js within the users group routes we defined in the previous lesson:
// unfollow user
Route.delete('/unfollow/:id', 'UserController.unFollow')
This also takes the ID of the user we want to unfollow as a parameter.
Next, add the code below to UserController:
async unFollow ({ params, auth, response }) {
    // get currently authenticated user
    const user = auth.current.user

    // remove from user's followers
    await user.following().detach(params.id)

    return response.json({
        status: 'success',
        data: null
    })
}
The is simply an inverse of the follow method as it makes use of the detach method to remove the user with the specified ID from the list of followers of the authenticated user.
User timeline
The last functionality we will add for users is “user timeline”. On a user’s timeline his/her tweets will be displayed along with the tweets of those he/she is following.
Add the code below to start/routes.js within the users group routes.
Route.get('/timeline', 'UserController.timeline')
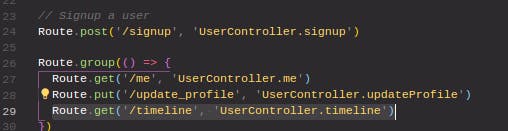
Your code should lokk like this
Next, define the timeline method. Add the code below to UserController:
// add this at the top
const Tweet = use('App/Models/Tweet')
//add this inside the controller
async timeline ({ auth, response }) {
    const user = await User.find(auth.current.user.id)

    // get an array of IDs of the user's followers
    const followersIds = await user.following().ids()

    // add the user's ID also to the array
    followersIds.push(user.id)

    const tweets = await Tweet.query()
        .whereIn('user_id', followersIds)
        .with('user')
        .with('favorites')
        .with('replies')
        .fetch()

    return response.json({
        status: 'success',
        data: tweets
    })
}
Building Tweet Functionality
Now we will begin building functionalities such as posting a tweet, liking, replying and unlike.
Posting a Tweet
Let’s allow users to post tweets. We’ll start by creating the route for this, so add the line below in start/routes.js:
Route.post('/tweet', 'TweetController.tweet').middleware(['auth:jwt'])
We add the auth to make sure only authenticated users can post tweets.
Next, let’s create the TwitterController:
adonis make:controller Tweet --type=http
Next, open the newly created controller and add the code below into it:
// add this at the top of the file
const Tweet = use('App/Models/Tweet')
//add this inside 'class TweetController'
async tweet ({ request, auth, response }) {
    // get currently authenticated user
    const user = auth.current.user

    // Save tweet to database
    const tweet = await Tweet.create({
        user_id: user.id,
        tweet: request.input('tweet')
    })

    // fetch tweet's relations
    await tweet.loadMany(['user', 'favorites', 'replies'])

    return response.json({
        status: 'success',
        message: 'Tweet posted!',
        data: tweet
    })
}
Fetching a single tweet
we just gave users ability to post tweets. Now, let’s fetch a single tweet. Add the line below in start/routes.js:
Route.get('/tweets/:id', 'TweetController.show')
Next, add the code below in TweetController.js:
async show ({ params, response }) {
    try {
        const tweet = await Tweet.query()
            .where('id', params.id)
            .with('user')
            .with('replies')
            .with('replies.user')
            .with('favorites')
            .firstOrFail()

        return response.json({
            status: 'success',
            data: tweet
        })
    } catch (error) {
        return response.status(404).json({
            status: 'error',
            message: 'Tweet not found'
        })
    }
}
Replying a Tweet
Now, let’s allow users to reply to tweets. Add the line below in start/routes.js:
Route.post('/tweets/reply/:id', 'TweetController.reply').middleware(['auth:jwt']);
This route takes the ID of the tweet a user wants to reply to.
Next, let’s create the reply method. Add the code below in TweetController:
// add this at the top of the file
const Reply = use('App/Models/Reply')

async reply ({ request, auth, params, response }) {
    // get currently authenticated user
    const user = auth.current.user

    // get tweet with the specified ID
    const tweet = await Tweet.find(params.id)

    // persist to database
    const reply = await Reply.create({
        user_id: user.id,
        tweet_id: tweet.id,
        reply: request.input('reply')
    })

    // fetch user that made the reply
    await reply.load('user')

    return response.json({
        status: 'success',
        message: 'Reply posted!',
        data: reply
    })
}
Favoriting a Tweet
Users might see tweets they really like and would love to show that by reacting to such tweets. Let’s add ability for users to mark tweets as favorites.
Add the code below to start/routes.js:
Route.group(() => {
    Route.post('/create', 'FavoriteController.favorite')
})
    .prefix('favorites')
    .middleware(['auth:jwt'])
Next, create the FavoriteController:
adonis make:controller Favorite --type=http
Once the controller is created, let’s add the favorite method to it:
// add this to the top of the file
const Favorite = use('App/Models/Favorite')

async favorite ({ request, auth, response }) {
    // get currently authenticated user
    const user = auth.current.user

    const tweetId = request.input('tweet_id')

    const favorite = await Favorite.findOrCreate(
        { user_id: user.id, tweet_id: tweetId },
        { user_id: user.id, tweet_id: tweetId }
    )

    return response.json({
        status: 'success',
        data: favorite
    })
}
Unfavorite a Tweet
For one reason or the other, users might want to unfavorite a particular tweet they had favorited before. Let’s give them the ability to do just that.
Add the code below to start/routes.js within the favorites routes group:
Route.delete('/destroy/:id', 'FavoriteController.unFavorite');
The route takes a tweet ID as a parameter.
Next, let’s add the unFavorite method to FavoriteController:
async unFavorite ({ params, auth, response }) {
    // get currently authenticated user
    const user = auth.current.user

    // fetch favorite
    await Favorite.query()
        .where('user_id', user.id)
        .where('tweet_id', params.id)
        .delete()

    return response.json({
        status: 'success',
        data: null
    })
}
Deleting a Tweet
For whatever reason, users may want to delete their tweets. So let’s give them the ability to do that. Add the line below in start/routes.js just after the route to reply a tweet:
Route.delete('/tweets/destroy/:id', 'TweetController.destroy').middleware(['auth:jwt'])
This route takes the ID of the tweet a user wants to delete.
Next, let’s create the destroy method. Add the code below in TweetController:
async destroy ({ request, auth, params, response }) {
    // get currently authenticated user
    const user = auth.current.user

    // get tweet with the specified ID
    const tweet = await Tweet.query()
        .where('user_id', user.id)
        .where('id', params.id)
        .firstOrFail()

    await tweet.delete()

    return response.json({
        status: 'success',
        message: 'Tweet deleted!',
        data: null
    })
}
Next, we will build out the interface of our application using Framework7 in the next tutorial. Thanks for reading, stay tuned.